Showing posts with label gifts for girls. Show all posts

Saturday, December 31, 2011

A homemade Christmas


Ok now that Christmas is over I can post all the homemade Christmas presents I made this year.  I love making homemade gifts and pinterest has made collecting ideas for projects so much more fun.  Above is the Cross stitch of the Seattle Temple.  This is for my sister in law and her husband, they were married there in 2009.  I covered up the part below the temple, becasue it has their full name and marriage date.


These cute little shoes, are for my soon to be new nephew :)

This Heads and tails  game is to go in the girls busy bag.


Pillow case nightgowns made from pillow cases I got at goodwill.


Make your own Monsters, for my little monsters

Old McDonald Puppets for the girls

Button snake for the busy bag

Busy bags with all the gear.  If you are looking for busy bag ideas click HERE for my previous post with links to all the ideas. 

Fat Quarter dresses for the girls.  Blue and pink for Claire, and Pink and Brown for Violet


Glittery letters
Hers are covered in scrapbook paper, I wanted mine to be sparkly.  I just painted and sprinkled glitter on top while the paint was still wet...you can spray a sealer on if you like but mine didn't really need it (I'll probably need to "re glitter" them next year because of that though).

                                                                  The ruffle tree skirt

Dried oranges for tree ornaments
I love the way these look on the tree.  The light shines through and it sparkles a pretty golden color.


dried cinnamon and apple sauce ornaments.  These smell heavenly and look cute on the tree.  Mine are made with mini cookie cutters, so the recipe made like 30 or 40 of them, plus a small blob of dough the girls could play with till it hardened.

 A ruffle scarf for my mom. Next time I make this I won't dye the fabric.  The process was messy and I wasn't happy with how it made the fabric feel in the end.

 2 little mermaids for the girls....they love them by the way :)

 Bread and Butter as a Christmas treat for my family and friends.

 Overall I had a lot of fun doing a homemade christmas this year.  If you don't enjoy doing homemade crafts I suggest going a different route because it is a lot of work and a lot of pre-planning.  I like to plan way ahead and I usually start seriously planning Christmas in september when all our summer traveling is wrapped up, and I started making stuff in September and I was busy with some stage of the crafting process all the way up until December 17th!

 Oh and last but not least my ultra secret project for Peter.  A Padded headboard!  Here is another Link on making your own headboard.  I'll do a more detailed post on the Saga of the headboard later but let me just say this is not a project for sissies...It involves lots of physical labor, table saws, power drills, giant needles, and lots of hammering!  It was fun.
 Now we've just got to get it out of my parents storage room and into my apartment.

 Thanks to my Dad for helping me for the last 2 months to put this thing together!

So if you are thinking of doing a homemade Christmas (in 2012 or beyond) my tips would be to:

1. Plan WAY ahead!- make a list of who you want to do gifts for or what decorations you want to make (I plan to start thinking about next year no later than March)

2. Sign up to get coupons from your local craft store- this stuff can all get pretty pricey!

3. Read through your instructions before you go shopping for supplies, you may find you need more than you planned

4. Shop for your materials before the Holiday rush...there is nothing worse than being stuck at the fabric counter at any point in the months of October, November, or Heaven help you if you try to go in December.  Crafters start crafting early so think ahead and get there even earlier! (the early bird gets to shop in peace)

5. Prioritize-What's going to take the longest? for me it was the headboard so I set aside time to work on it each week at my parents house, it took about 8 weeks of slow and steady work.

6. If you don't like to do this kind of stuff....don't do it.  It saves a little bit of money but not so much that it is worth torturing yourself.  I happen to enjoy making the things I did so it worked great for me, but if you would rather just hit the mall...go...do it...It's supposed to be a MERRY time of year :)

7. Set an "end of crafting" day at least 3 or 4 days before the holiday (if you cook, entertain or bake for the holidays, give yourself a break and quit the crafts at least a week in advance).  There is always something else that can be made, there are so many cute decorations to put up, but at some point you just have to say  I'm DONE and enjoy the holiday.

I hope you all had a Merry Christmas and Happy Holidays.

Happy New Year!


oh....and check out this cute little puppy that is joining our family in a couple weeks...I'm so excited!

 o

Friday, December 16, 2011

2 little Mermaids

2 Little Mermaids have joined the ranks of Christmas gifts for the girls.  They have yet to be wrapped so they are hiding in my closet.  I have one blond daughter and one red headed daughter so they each got a doll that matched them. I used all left over fabric from my mom's fabric bins so this project was practically free! yay!
I found this pattern over at the Crafting Fiend.  It is a free Pdf download, the only part that didn't come up in the download was the body so I just made a long trapezoid that was the same width of the neck and not as wide as the tail width pre-smocked and I think the length was about 6 inches.   Their necks seem a bit long to me so I'm thinking of making a little necklace for them...what do you think?

The most exciting part of all?  This is my last sewing project of the year and my final gift for the girls!  After today I will be almost done baking my bread  and then I just have to finish Peter's top secret gift, and one quick gift for my mother in law and then I can just relax until Christmas!

Tuesday, December 6, 2011

Make your own green glitter....or the case of the crusty pile of green salt


I still don't have my camera back...ummm Mom...I kind of use that a lot.  I tried to make my own glitter because I was making my own 


Calm Down Jar for the girls and I needed more glitter because I had used most of my glitter supply to make glittery letters to go over my piano that spelled 
Joy.

So I was really excited when I saw this picture on Pinterest 

Awesome!!! Now I can avoid one more trip to JoAnns...it get's a little weird when more than one employee recognizes you because you have been in more than 3 or 4 times that week.

Ok so the recipe says to mix up some salt with some food coloring and bake it on a tin foil lined baking sheet, and 10 minutes later you will have a 1/4 cup of gorgeous glitter.  
well I decided to make green glitter cause it's my favorite color and I thought it would work well in the purple calm down jar I was making...sounds cool huh?

Well what I got was a sheet of crusty green salt, not sparkly at all.  I used gel food coloring so maybe that was it.  I'm willing to try this one again with liquid food color but for now my calm down jar is just a little less fabulous than I want it to be.  That's ok it doesn't calm the kids down at all it makes them run around screaming SPARKLES!!! SPARKLES MOMMY!!!!


Wednesday, November 30, 2011

Homemade Gak!

I lent my camera to my mom so you will just have to take my word for it, but this morning the girls and I made Gak in our kitchen.  For your viewing pleasure I added the original Gak commercial above...your welcome.

Anyways, it's super easy and only takes a few minutes to mix up some gak.   Here is the site that I got the idea from.  They made theirs glow in the dark.  We made ours orange because that was the color of my Gak when I was as a child.
Here is the video of instructions.  It's a video a kid made for his science class and the steps are easy to follow.
You will need
1 cup Borax
1 cup water
mix that up until the borax is disolved
1/4 cup elmers glue
1/4 cup water
food coloring (optional but you know you want to use it)
Mix that up

Then add small amounts of the borax solution (the video says some drops, I used a 1/4 teaspoon) and stir.  keep adding and stirring until you get a tough slimy consistency.  Then rinse your slime off and dry it (I would recommend either a paper towel or a towel you don't care to use again, I'm still not sure if I can save my towel or not).

The kids love it and if they drop it on the carpet it doesn't get ground in right away like play dough (I'm certain that given enough unsupervised time a determined child could grind it into your carpet, so please don't come crying to me when your carpet is ruined)

Now, Violet is at school and Claire is watching a cartoon, so I'm going to go play with my Gak.

Saturday, November 19, 2011

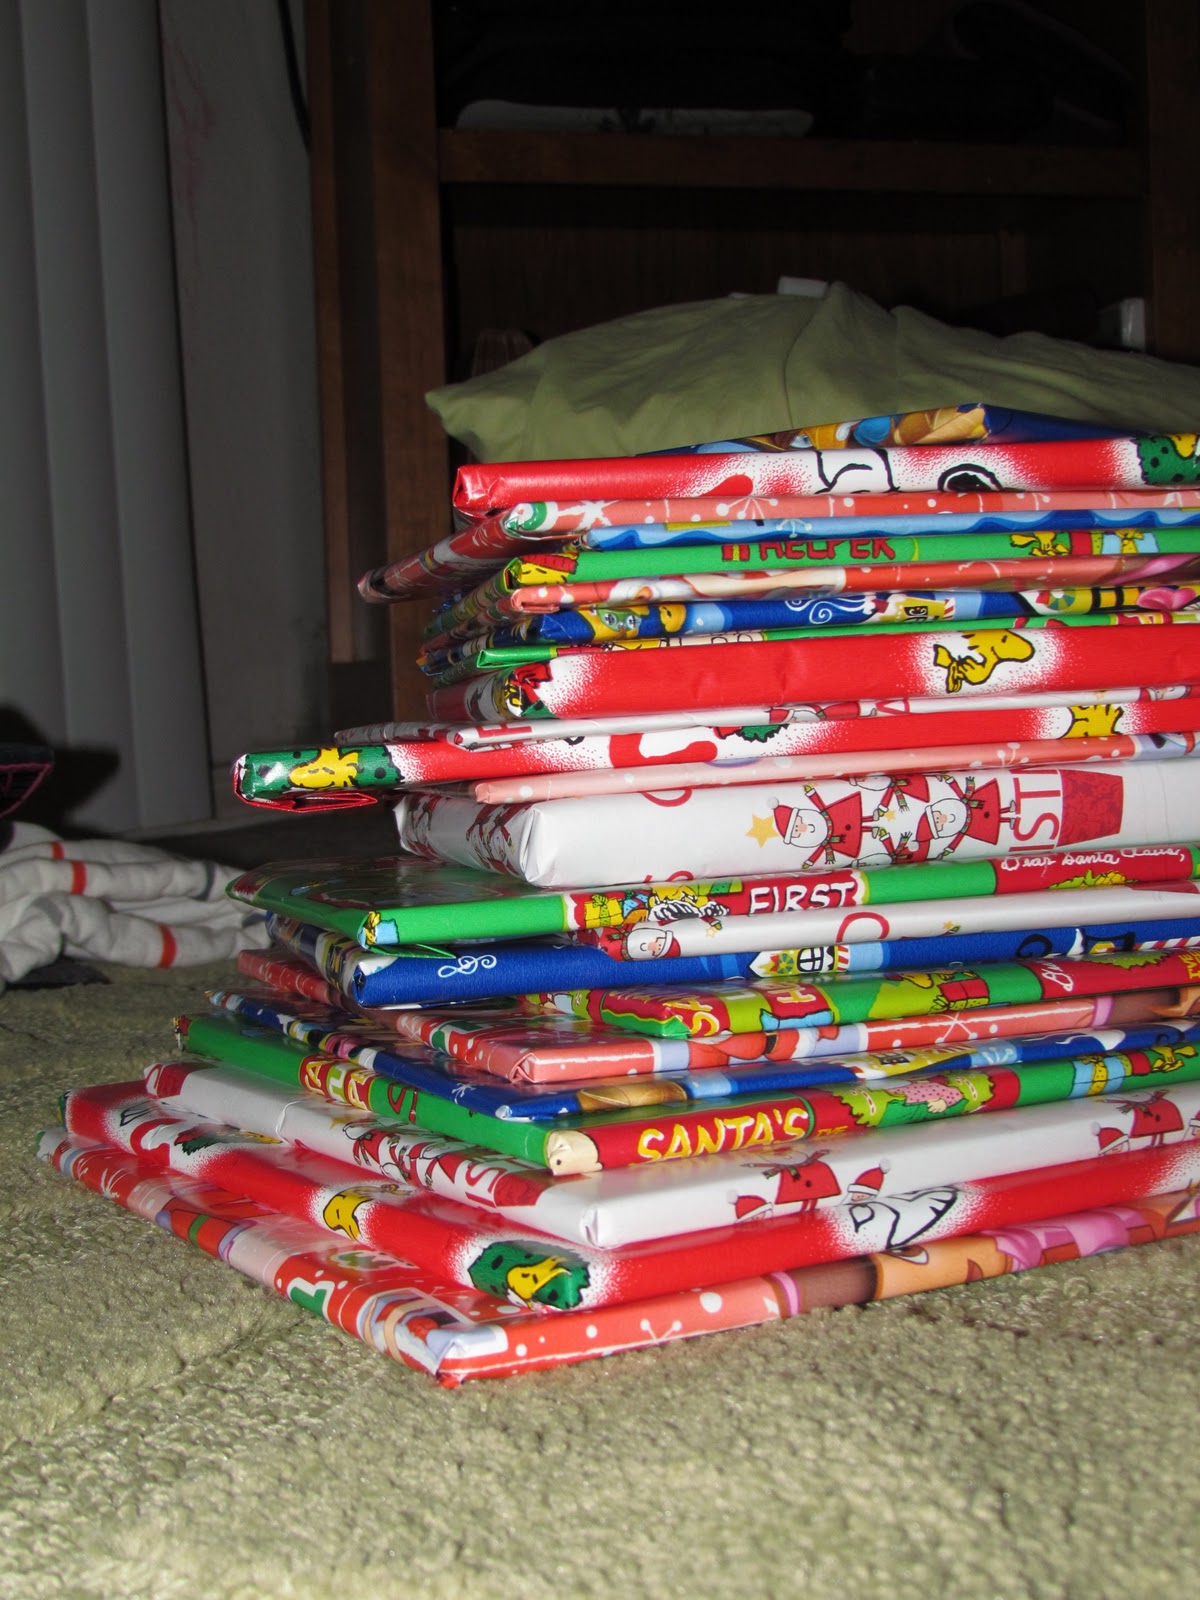
Christmas book Countdown!


 Ok I am super excited for December to get here because of this Christmas countdown that our family is doing this year.  I did find this on pinterest but it looks like in all my excitement over the idea I forgot to pin it, but you don't really need the pin because it's an obvious concept :)  24 days of counting down to Christmas, and 24 books to open....one each night to read with the girls.

I am so excited about this!  I LOVE reading!  I read all the time and I have usually have a stack of 3 or 4 books by my bedside because I like to work on multiple books at once, I just can't focus on one.  my average library checkout total is 17...so yeah I like books.  I am always looking for ways to share my love of books with my kids.  We go to the library story time, and we check out a ton of books, we have story time, and I make sure that they see me reading too.

 I had hoped to buy some nice new books for our countdown supply but like everyone else in the world, our family budget is a little tighter this year than it has been before.  So I checked into the penny books on Amazon, and there were a ton under "Children's Christmas books" but shipping was 3.99 and considering I needed 15 more books to complete the 24 that was still too much money for us this year, so we will be collecting nice books a little at a time.

   I had 9 books already and so we hit the good will for the other 15.  For 20 dollars we got 15 Children's Christmas books ( they were mostly generic It's Christmas time stories, but the kids will like them) an Aladdin book and  mini Carebear for our little helpers :)  Also...sorry if you are at the Olympia Goodwill and cannot find any children's Christmas books....we bought them out.

 If you are on a really tight budget you could check Christmas books out from the library and just keep renewing them...at my library you can check the same book out 3 times in a row online and each checkout period is 3 weeks, so that is plenty of time to collect books from the library and do the countdown.  Also I'm sure everyone has family and friends that would be willing to lend some Christmas books to your cute little kids :)

This year we will be collecting The polar express for our nice book.  I am so excited, I love that book and I actually can't believe that we don't already own it because Peter loves it too.

Here is a list of books that I found on Amazon that I thought looked cute:
1. Who is Coming to our house
2. Olivia Helps with Christmas
3. Merry Christmas Curios George
4. I spy Christmas: A book fo Picture Riddles
5. Froggy's Best Christmas
6 Rudolph the Red-Nosed Reindeer
7.Thomas's Christmas Delivery
8. The Night before the Night before Christmas
9. Duck and Goose: It's time for Christmas
10.  Merry Christmas Mom and Dad (Mercer Mayer)
11. How the Grinch stole Christmas  (of course)
12. A wish to be a Christmas Tree
13. Bear Stays up for Christmas
14. Merry Christmas Stinky Face
15. A charlie Brown Christmas (is it Christmas without ole CB?)
16.  Elf on the Shelf ( Holy Cow even used he is 30 bucks!)
17. Yes Virginia, There is a Santa Claus
18.  The tale of the Three trees
19. The Polar Express
20. The gift of the Magi
21. The animals Christmas Carol


Friday, November 18, 2011

Busy Bags for busy babes


There are tons of busy bag ideas on pinterest for your kids.  I come across a new set just about every day.  above is a picture of the busy bags I put together for my girls for Christmas.  I am looking forward to it as a way to get through that first hour of church where we are all supposed to be sitting quietly...HA!  I got the bags from Oriental trading company.  They have a ton of cheap and cute options, and the Hello Kitty pouches came from DH Gate ( I know cheap Chinese crap, but I'm hand making a majority of the presents this Christmas, so I feel justified)

Each bag for the girls contains 5 pouches
1. Brown bear heads and tails game, super easy to make just print, cut, and laminate


3. a pouch with some of their toy animals ( they have so many, they haven't even noticed that I've "borrowed" a few on behalf of Santa)

4. A pouch of cars (same situation as the toy animals)

5. A pouch of Flash cards from Target ( Do you ever shop Targets dollar section? It's great for kid stuff)

Ok so I only made 2 things in this pouch but, it is going to be a great present and I know the girls will love it.  

Thursday, October 27, 2011

what should I use them for?


I set out to make bath tub crayons for my girls for christmas and what I got was cute soap that doesn't write on the bath tub.  


 I made them in this cute heart mold I got at Joanns because I also want to make these heart crayons for Valentines day because there are so many allergies in Violet's preschool class that choosing an appropriate treat for valentines is impossible.


This is a simple project.  Just melt clear glycerine (which you can no longer get in store at Joanns, so I got a pound of it on Amazon) in the microwave, add food coloring (I used neon gel), pour into whatever mold you want and try to convince your 2 year old that they are not candies but soap.  I might as well have skipped that last step because she took a bite out of one anyways.    

So they are cute and easy to make but they do not write on the tub.  So what should I do with them?  I have 23 little soap hearts now.  Any ideas?

Wednesday, October 26, 2011

ahhh! Monsters!

Have you noticed that Monsters are everywhere these days? (I'm not just referring to the upcoming halloween either)  I bought a baby outfit for a little boy and everything was monster theme, kids toys are monster themed, jewelry school supplies, dishes.  It's so cute.

  I found this Make your own monster craft on pinterest a few months ago (check out all the cute monsters on that post) and I knew I would make one for each of my girls.  I didn't know where to get the specific monster parts so I was trying to get all cute and crafty and I was going to make all the monster parts with iron on transfer paper and monster pictures I found online, and then while walking through target I found this on clearance....

Sweet, much less work for me!


 I ironed all the monster pieces onto felt, then cut them out and stuck velcro on the back.  The rest is just felt (this is my last christmas felt project!  Hurray!)

Then I used the monster body and some accessories to make the monster on the front.  I had so much fun making this and if the girls don't like it I might play with it.  I made two so if they both don't like it Peter and I can have monster making contests!

you can get your own monster iron ons at this link.  


were you a fan?

Tuesday, October 25, 2011

old McDonald had a farm....

They are done!

The first step was to cut all the pieces out, (that took an entire night!  Don't underestimate how long it will take to cut out 16 tiny black eyes....I think I've used as much felt as I can stand for at least a year....dang I have one more small felt project for Christmas)

 then to glue the pieces to the body (Hint...just hot glue in the middle of the pieces, trying to sew through hot glue is impossible!)

and then to embroider around those parts ( I had a lot of embroidery thread in the appropriate colors so I only had to buy a few new colors, but they are only 30 cents each)

 and then sew it all together! ( my sewing machine was not happy with me about this part.  Sewing felt can make for a lot of fuzz in your sewing machine so keep a little brush handy to clean out the needle and little gripper teeth often or your machine will jam...A LOT)


  Here is the original pattern for the puppets.  They take about a week of nightly work but I think they are so cute  and the girls will love them so they are worth the effort.


 aren't they cute?  My favorites are the little lamb


  and the kitty.


Saturday, October 15, 2011

Butterfly mobile

For some reason I thought felt would be so simple to work with.  And for the most part it is, unless you are trying to cut out a delicate design.  Then it becomes an obnoxious fabric that I swear I would never use again... until I started making farm animal puppets a week later.

This butterfly mobile (which isn't really a mobile because it isn't meant to be hung over a crib because it is super long and would definitely be a strangulation hazard) is for my niece for Christmas this year.  She has a red and pink and black lady bug themed room, so I thought butterflies would look cute.  Here is the blog where I got the butterfly template.

Even though I hated cutting out the butterflies it was actually a really simple project.  I used a super small hole punch to make the holes for the yarn to go through since my plastic yarn needle was no match for the tough felt.

The top is a 4 inch wreath form with coordinating ribbons tied on it.

Thursday, October 13, 2011

I know how to sew now!

Look what I made!  I am so proud!  It's a nightgown made from a pillow case!  A PILLOW CASE!  ok so It's not that complicated but I'm not a great seamstress so I am excited that they look cute and haven't fallen apart yet.  I made six...Violet and I got a little carried away at Goodwill picking out pillow cases.  Each night gown takes about  1-2 hours.   You will need pins...lots of pins!

Here is the pattern in case you want to try it out :)