Showing posts with label homemade. Show all posts

Sunday, June 17, 2012

The Bad puppy Cure

Yeah sure she looks sweet, when she is sleeping.  But those of you who have had a puppy know they are little peeing machines!

 Zelda peed everywhere when she was brand new, and always right in front of the door because I don't have super speed skills when it comes to putting a leash on.

 I think we have finally come out on the other side of house training and I think I'm going to say we were successful.  But as I look around I see all these little stains she left behind.

I've tried regular carpet cleaners and they just don't seem to work very well on puppy stains. So I have been looking for any solutions to my stained carpet ( If we weren't renters I would just rip it up, I hate our carpet even without the stains)

Tonigh I tried this "make at home" cleaning solution, which is 1:1 water and ammonia. It worked great!

1. Find a "Bad Puppy" stain


 2. Heavily soak the stain in the ammonia solution ( #1 rule of ammonia is KEEP IT AWAY FROM BLEACH!!!! The combination creates fatal fumes)


3. Place a WHITE towel over the stain (only use a white towel so you don't transfer the towel color to the carpet and make the stain worse) and iron up your stain with your iron on it's highest setting.


 4. Go...EEWWWWW gross at the sight of the funky towel


5.  Be amazed! now to just repeat in small sections.  Ammonia is pretty smelly so make sure you do this only in a ventalated room and don't do it for more than a few minutes at a time.  I did three stains tonight and tomorrow I'll pick another spot to do. (that dark spot in the bottom corner is a shadow of my elbow not another stain....don't worry though there are plenty more for me to practice this technique on).

sorry the pictures aren't great, I forget to turn off my camera everytime I use it so the battery is never charged (plus no one wants high def pictures of a puppy stains...bleh)

Tuesday, February 21, 2012

stuff I've tried round up and the 1 week check in


Ok so I haven't been blogging much lately...what can I say...life happens.  Anyways.  I have tried a few things from Pinterest lately that I have really liked.  Let's start with $5 dinners


why not?  I would love to cut our grocery bill down.  So I gave the dinners a shot and for the most part they are ok (the list above is half $5 dinners and half of the Freezer meals, I had leftover from last month)  So the cheap meals are Chicken or tuna casserole, chili and cornbread, grilled cheese and tomato soup, breakfast for dinner, chicken fettucini, and spaghetti and meatballs.  

First off I hate casserole, it makes me physically ill, but I tried the tuna one anyways and nope nothing has changed about my bodies ability to eat a casserole and a spent the night sick...blah.

I like the chili and cornbread because it all came from a box or a can and it took 10 minutes to make, the kids ate and I like it so I would call that a successful cheap meal,  I like grilled cheese and soup but the kids don't so that one is an adults only cheap meal.

Of course pasta is always an acceptable meal for our family, fettucini and spaghetti were a big hit.  Oh and breakfast for dinner...who doesn't love that?

conclusion: they were cheap and I liked about half of them, however they are not very healthy and these dinners still require the addition of a veggie.

UP NEXT:  Brownie Pizza

I made this for V day.  I simplified the recipe even more by using a can of cream cheese frosting and omitting the apple butter.  


It was delicious.  The frosted brownie was super sweet so the raspberries were perfect for on top because they were a little tart.

Up Next : A t-shirt Scarf and a DIY Cardigan

These are both super easy.  I took a sweater that fits me weird

and two t-shirts I didn't like anymore (for obvious reasons)

  and turned them into this:

I didn't use the hemming tape the sweater I just did a roll stitch to get a clean edge.  I also used a sweater so it was a little wavy when I finished but once it was washed once it took a better shape.

The above picture also serves as my "BEFORE" picture for my 14 day challenge.  It was taken on Wednesday when I took my first measurements.  So it has been about 6 days of working out and I'm starting to see some great results!

here I am today. 

Here is my inches lost report
Bust: - 4 inches (some may not like to lose in their bust but I am super happy to lose it!)
Waist at belly Button: -2 inches
Waist @ the dreaded love handles: -3 inches
Hips @ bum: - 2 inches
Thigh: - 1 1/4 inch
Calf: - 1 inch
Bicep: - half inch
Neck: -1 inch

yay!  If you haven't read about the 14 day drop a size challenge head on over to my previous post.  And get started today!  I have a pair of leather pants from High school that I would like to fit into and with these inches lost I am getting closer every day!


Monday, January 2, 2012

Not so fast


I was pretty excited when I first tried this homemade dishwasher soap 6 weeks ago, but I have steadily become disenchanted with it.  It started with a few dishes being a little spotty and then steadily progressed into not being able to tell the difference between clean and dirty dishes.  This one lasted a long time and if it had actually worked long term it would have been amazing but I've given it all the time I can and now it is time to eat off of clean dishes.

******UPDATE***** I mixed it with water into a paste and used it as cleanser for my tub.  So all is not lost, it works great as a mild bathroom and kitchen cleaner :)

Saturday, December 31, 2011

A homemade Christmas


Ok now that Christmas is over I can post all the homemade Christmas presents I made this year.  I love making homemade gifts and pinterest has made collecting ideas for projects so much more fun.  Above is the Cross stitch of the Seattle Temple.  This is for my sister in law and her husband, they were married there in 2009.  I covered up the part below the temple, becasue it has their full name and marriage date.


These cute little shoes, are for my soon to be new nephew :)

This Heads and tails  game is to go in the girls busy bag.


Pillow case nightgowns made from pillow cases I got at goodwill.


Make your own Monsters, for my little monsters

Old McDonald Puppets for the girls

Button snake for the busy bag

Busy bags with all the gear.  If you are looking for busy bag ideas click HERE for my previous post with links to all the ideas. 

Fat Quarter dresses for the girls.  Blue and pink for Claire, and Pink and Brown for Violet


Glittery letters
Hers are covered in scrapbook paper, I wanted mine to be sparkly.  I just painted and sprinkled glitter on top while the paint was still wet...you can spray a sealer on if you like but mine didn't really need it (I'll probably need to "re glitter" them next year because of that though).

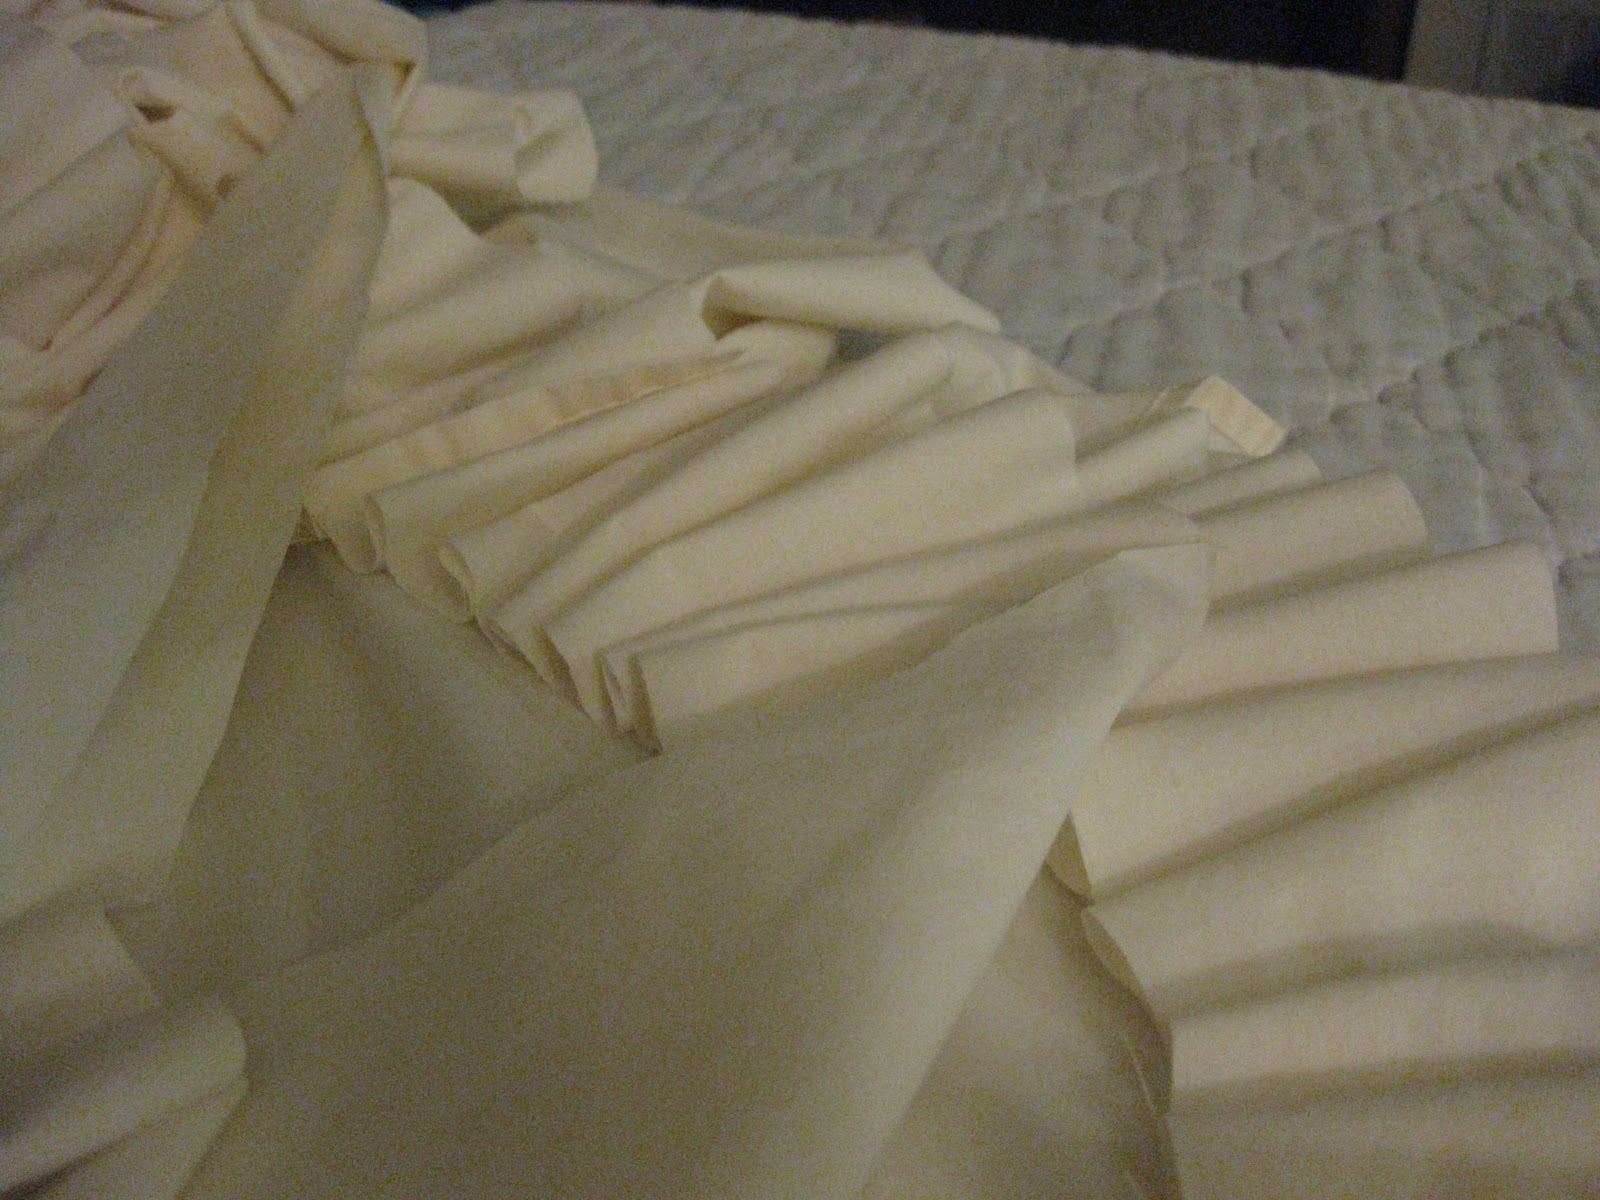
                                                                  The ruffle tree skirt

Dried oranges for tree ornaments
I love the way these look on the tree.  The light shines through and it sparkles a pretty golden color.


dried cinnamon and apple sauce ornaments.  These smell heavenly and look cute on the tree.  Mine are made with mini cookie cutters, so the recipe made like 30 or 40 of them, plus a small blob of dough the girls could play with till it hardened.

 A ruffle scarf for my mom. Next time I make this I won't dye the fabric.  The process was messy and I wasn't happy with how it made the fabric feel in the end.

 2 little mermaids for the girls....they love them by the way :)

 Bread and Butter as a Christmas treat for my family and friends.

 Overall I had a lot of fun doing a homemade christmas this year.  If you don't enjoy doing homemade crafts I suggest going a different route because it is a lot of work and a lot of pre-planning.  I like to plan way ahead and I usually start seriously planning Christmas in september when all our summer traveling is wrapped up, and I started making stuff in September and I was busy with some stage of the crafting process all the way up until December 17th!

 Oh and last but not least my ultra secret project for Peter.  A Padded headboard!  Here is another Link on making your own headboard.  I'll do a more detailed post on the Saga of the headboard later but let me just say this is not a project for sissies...It involves lots of physical labor, table saws, power drills, giant needles, and lots of hammering!  It was fun.
 Now we've just got to get it out of my parents storage room and into my apartment.

 Thanks to my Dad for helping me for the last 2 months to put this thing together!

So if you are thinking of doing a homemade Christmas (in 2012 or beyond) my tips would be to:

1. Plan WAY ahead!- make a list of who you want to do gifts for or what decorations you want to make (I plan to start thinking about next year no later than March)

2. Sign up to get coupons from your local craft store- this stuff can all get pretty pricey!

3. Read through your instructions before you go shopping for supplies, you may find you need more than you planned

4. Shop for your materials before the Holiday rush...there is nothing worse than being stuck at the fabric counter at any point in the months of October, November, or Heaven help you if you try to go in December.  Crafters start crafting early so think ahead and get there even earlier! (the early bird gets to shop in peace)

5. Prioritize-What's going to take the longest? for me it was the headboard so I set aside time to work on it each week at my parents house, it took about 8 weeks of slow and steady work.

6. If you don't like to do this kind of stuff....don't do it.  It saves a little bit of money but not so much that it is worth torturing yourself.  I happen to enjoy making the things I did so it worked great for me, but if you would rather just hit the mall...go...do it...It's supposed to be a MERRY time of year :)

7. Set an "end of crafting" day at least 3 or 4 days before the holiday (if you cook, entertain or bake for the holidays, give yourself a break and quit the crafts at least a week in advance).  There is always something else that can be made, there are so many cute decorations to put up, but at some point you just have to say  I'm DONE and enjoy the holiday.

I hope you all had a Merry Christmas and Happy Holidays.

Happy New Year!


oh....and check out this cute little puppy that is joining our family in a couple weeks...I'm so excited!

 o

Tuesday, December 20, 2011

Texas Roadhouse Butter

This years "Christmas Treat" is Texas Roadhouse Butter with Old english oatmeal bread.    I found the butter recipe on Pinterest via a blog called Fly through your window.  Check it out, it's a cute blog.  The bread recipe is from a Williams Sonoma baking cook book and they don't publish this particular recipe on their website so I don't think I should publish it here.  If you live near me though I would be more than happy to let you take a look at my cook book.

Thank you to whoever gave me that book for my wedding 6 years ago.   I have used it many times and the recipes always turn out wonderfully!  If you like to bake I would recommend This book.

Anyways, the butter is super easy to make and it is fantastic.  I like to eat it on toast for breakfast.  I have learned in my limited experience of making flavored butter (my Dad always made honey butter for Thanksgiving....mmm) it is best to let your butter soften at room temperature.  DO NOT MELT YOUR BUTTER!!! You will get a weird butter in the end and you won't be happy.  

Enjoy!

Friday, December 16, 2011

2 little Mermaids

2 Little Mermaids have joined the ranks of Christmas gifts for the girls.  They have yet to be wrapped so they are hiding in my closet.  I have one blond daughter and one red headed daughter so they each got a doll that matched them. I used all left over fabric from my mom's fabric bins so this project was practically free! yay!
I found this pattern over at the Crafting Fiend.  It is a free Pdf download, the only part that didn't come up in the download was the body so I just made a long trapezoid that was the same width of the neck and not as wide as the tail width pre-smocked and I think the length was about 6 inches.   Their necks seem a bit long to me so I'm thinking of making a little necklace for them...what do you think?

The most exciting part of all?  This is my last sewing project of the year and my final gift for the girls!  After today I will be almost done baking my bread  and then I just have to finish Peter's top secret gift, and one quick gift for my mother in law and then I can just relax until Christmas!

Wednesday, December 14, 2011

8 hours later...

 I pinned this ruffled tree skirt how to, months ago and I have been wanting to make one for this year.  I was thinking about what kind of fabric to use.  I had seen it first in the cream, then in burlap and lace, and then in bright Christmas colors.  I loved the lace but hated the burlap, and Peter loved the cream, so I decided to do the cream with just a little bit of lace.

I found in my sheets pile 3 flat sheets that were the perfect color.  Thanks Mom for the hand me down sheet tops! I cut a 4 1/2 foot square out of one sheet and used the border piece as my width guide for the strips.  I cute the strips the the short length of the sheet to make them more managable.
 I cut up 2 twin size top sheets and the rest of the third after having cut out the base of the skirt from it, so this requires about 2 1/2 sheets worth of strips.  I also had 3 yards of lace which only made about a quarter of a row of ruffles, so I placed it strategically so it would show in the front.

  My pile of strips.  It ended up being about 2 times this size.

 next I just hot glued the strips to the base, making a ruffle as I went.  One thing I liked about this skirt was the messy, unfinished edges, this is my kind of project because after doing something for 8 hours I am not precise about anything.

 Finished!  everyone else has long gone to bed and left me to my ruffle gluing.  I had to wake up Peter to show him because it had taken so long and I needed to share my success with someone!

I love it!  It is so heavy though I bet it weighs 10 pounds or more!
 The tree is almost done, next I'm going to dry oranges and lemons to hang, and string some popcorn and cranberries for garland.  11 days till Christmas!!!

Tuesday, December 6, 2011

Make your own green glitter....or the case of the crusty pile of green salt


I still don't have my camera back...ummm Mom...I kind of use that a lot.  I tried to make my own glitter because I was making my own 


Calm Down Jar for the girls and I needed more glitter because I had used most of my glitter supply to make glittery letters to go over my piano that spelled 
Joy.

So I was really excited when I saw this picture on Pinterest 

Awesome!!! Now I can avoid one more trip to JoAnns...it get's a little weird when more than one employee recognizes you because you have been in more than 3 or 4 times that week.

Ok so the recipe says to mix up some salt with some food coloring and bake it on a tin foil lined baking sheet, and 10 minutes later you will have a 1/4 cup of gorgeous glitter.  
well I decided to make green glitter cause it's my favorite color and I thought it would work well in the purple calm down jar I was making...sounds cool huh?

Well what I got was a sheet of crusty green salt, not sparkly at all.  I used gel food coloring so maybe that was it.  I'm willing to try this one again with liquid food color but for now my calm down jar is just a little less fabulous than I want it to be.  That's ok it doesn't calm the kids down at all it makes them run around screaming SPARKLES!!! SPARKLES MOMMY!!!!


Wednesday, November 30, 2011

Homemade Gak!

I lent my camera to my mom so you will just have to take my word for it, but this morning the girls and I made Gak in our kitchen.  For your viewing pleasure I added the original Gak commercial above...your welcome.

Anyways, it's super easy and only takes a few minutes to mix up some gak.   Here is the site that I got the idea from.  They made theirs glow in the dark.  We made ours orange because that was the color of my Gak when I was as a child.
Here is the video of instructions.  It's a video a kid made for his science class and the steps are easy to follow.
You will need
1 cup Borax
1 cup water
mix that up until the borax is disolved
1/4 cup elmers glue
1/4 cup water
food coloring (optional but you know you want to use it)
Mix that up

Then add small amounts of the borax solution (the video says some drops, I used a 1/4 teaspoon) and stir.  keep adding and stirring until you get a tough slimy consistency.  Then rinse your slime off and dry it (I would recommend either a paper towel or a towel you don't care to use again, I'm still not sure if I can save my towel or not).

The kids love it and if they drop it on the carpet it doesn't get ground in right away like play dough (I'm certain that given enough unsupervised time a determined child could grind it into your carpet, so please don't come crying to me when your carpet is ruined)

Now, Violet is at school and Claire is watching a cartoon, so I'm going to go play with my Gak.

Sunday, November 20, 2011

Dishwasher soap

 Ok I had very low expectations for this homemade dishwasher soap.  I live in an apartment that was built in the 80's and I'm pretty sure I have the original dishwasher.  I cannot use cheap or generic dishwasher soap in this machine and get anything back but food covered nasty dishes.  So I have been shelling out for the cascade/ dawn dishwasher packs, which is fine, they work great, I love them and I mean come on who isn't going to pay to have clean dishes?  But if you can get the same results for cheaper FANTASTIC!  I am always looking for ways to slash small expenses from our budget.

The recipe calls for 24 packets of unsweetened lemonaide Kool aid...umm that is like 12 bucks worth of Lemonade this time of year.  So I just bought the 3 dollar can of Country time and called it good.

You need to use a rinse aid called Lemi Shine with each load to make this work, but it is only a few dollars and you can buy it at Safeway.  Use a Table spoon of Lemi Shine and a Table spoon of the dishwasher soap in each load.   Making this stuff is super easy, just get two big bowls and divide your ingredients between them and mix them up ( you could use one GIANT bowl if you have one but I don't)The recipe makes 5 quarts and according to a calculator I found online that equals 320 tablespoons!  Given the cost of the ingredients and the lemi shine making one batch of this dishwasher detergent costs the same as one 60 load package of cascade packs.  So that is more than 5 times as cost efficient!! Oh Please work!  Please!

I really tested this stuff.  I didn't pre rinse my dishes and I had been making cranberry salsa and I had emptied out my fridge of leftovers so I had some nasty tupperwares and sticky food processor parts, plus our regular dishes and sippy cups......

It totally works!  I was so shocked! So this one is getting filed under AWESOME!

Bonus I can now cut out 15 dollars worth of dishwasher soap from my grocery budget!